Have you ever heard about the term “HubSpot” or its “blog publishing tool”?
If yes! It’s Great! Today, I will explain the usage of this tool and how you can manage it more effectively.
If your answer is No, then getting through this guide, you will get all the answers to your queries regarding the blogging tool of HubSpot.
We all know that various blogging tools are available in the market, such as WordPress, HubSpot, etc. Organizations commonly use these platforms to post informative or engaging content in an optimized way.
Now the question is, when there are a plethora of tools to choose from, why choose HubSpot?
Here is your answer!
Comparison between HubSpot Blogging software and WordPress.
|
Factors |
HubSpot |
WordPress |
|
Easy to Use |
Yes |
Yes |
|
Secured connection |
Yes |
Need proper analysis |
|
Cost |
Need to pay an affordable cost to get extraordinary services. |
Provides services at less cost. |
|
SEO |
Optimized content |
Requires additional plugins |
|
Social media Integration |
Yes |
Requires additional plugins to monitor, schedule, and analyze social media content that is paid. |
Hope! You decide to go with what will be better for your business.
Is it HubSpot? Wanna know more about it? Well, we are here to help you. Scroll down and get a deep understanding of the HubSpot Blogging software.
What is HubSpot?
HubSpot is an integrated platform that provides inbound marketing, sales, and services to attract, engage, and delight customers and convert them into leads to generate more revenue and build a stronger relationship with potential customers.
Also, this software helps the agencies to build an appealing website without putting in much effort and time. Further, HubSpot landing pages allow you to create a website without any hassle.
Organizations prefer to use this all-in-one integrated system to raise their business productivity and grow more traffic towards their website by using informative and attractive content.
As per research, more than 172,620 websites use HubSpot to manage their business activities, such as contact management and many more.

Source: trends.builtwith
Such immense growth has been observed in the above graph. Because organizations manage their blog content using the HubSpot management tool, click here to know more about HubSpot.
Are you familiar with the reasons why organizations prefer to use the HubSpot blog tool? If not, then read its importance in the next chapter.
Importance of Blog Post in HubSpot
Being into the world of marketing, I always prefer to use the tool by evaluating its benefits. If all the essential features fulfill my business requirements, I decide to use that particular tool. Perhaps, you too, follow the same concept.
Am I Right?
So, let's take a run down to the advantages of a Blog post in HubSpot.
Drive more Traffic to your Website
By uploading blogs to HubSpot, you can easily generate more traffic to your website. How? Well, if the uploaded content is of good quality and published in an optimized way, more audience will read the content, further reducing the bounce rate and increasing traffic.
It is only possible if you will publish the blog accurately. It can be done using the HubSpot Blog post tool as you can remove extra spaces and set the image size directly through this platform.
Once you publish the blog, users can quickly discover it via social media. Therefore, it is the essential benefit of using the HubSpot blogging tool.
Analyze the Performance of the Blog
Can you analyze the performance of your published blog? HubSpot tool will help you evaluate the posts; you can quickly analyze whether the audiences are interested in reading the published article.
After evaluating, you can edit and update the blog at any time by understanding the diverse interests of the audience.
Isn't it interesting! So, start analyzing your published blog and improvise it quickly.
Manage and update the Post Securely
By using HubSpot, you can manage and update the content without facing any security challenges. It is another advantage of this tool because while uploading new content, you can directly save it as a draft and publish it afterward. No, one can copy the content without having your credentials.
Therefore, it is the best tool to help you publish and store new blogs without facing any privacy challenges.
Directly publish Blog on Social Media
You might be using various tools to write and publish the same content. Is it true? Here, you get a better option to strategize your activities such as blog publishing, social media sharing, etc.
HubSpot blogging tool will help you to directly publish your blog through it on various social media platforms.
In starting, you may have to spend some time while understanding its concept. But, once you get into it, you can perform all the tasks related to blog publishing quickly and substantially.
Encourage Inbound Links
As per analysis, it is evaluated that the organizations have received 97% more links to their website just by adding good quality blogs. Therefore, it is crucial to get the tool that will rank your website in search engine results by adding inbound links to your blog.
Do you wish to achieve the correlated goal? I prefer using HubSpot to encourage inbound links in your website blogs.
Want to avail such benefits to better your blog quality and uplift the performance of the blog? Well, migrate to HubSpot- All-in-One marketing tool.
Are you satisfied? Thinking about migrating your blogs to HubSpot? Do you want to grab more knowledge about HubSpot Blogging Tool? Redirect to the next topics of this roadmap.
Features of the HubSpot Blog Tool
HubSpot gives the content writers the most crucial tool by using which they can write, upload, edit and optimize blog post-HubSpot easily to generate more traffic to their website.
Let’s learn more and dive into the promising features of the HubSpot Blog tool.
Post
It is common that while creating a blog post, you may perform some errors. Don't Worry! HubSpot provides the platform where you can edit, remove errors and update your blog post quickly.
HubSpot also offers a draft mode editor, which will help all the content writers focus on their content without hindrance.

Settings
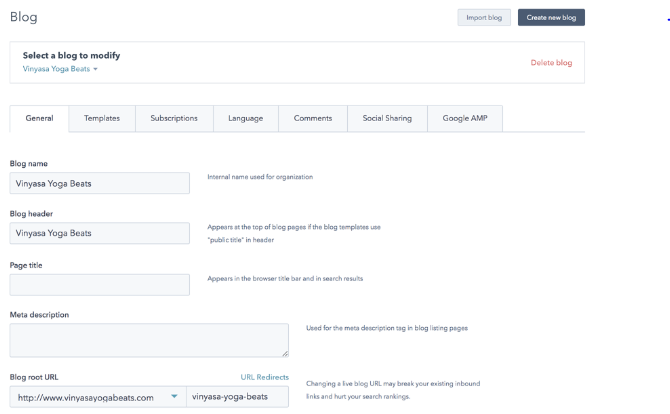
To manage your existing blog option, visit your blog settings and update the content. Using this feature, you can reset the changes for your blog root URL, subscription, language setting, etc., without taking any help.
While using this feature, you can directly edit blog name, blog header, page title, meta description, and many more. This feature is essential from an SEO point because adding meta descriptions and changing URL according to the searches will help you increase traffic to your blog.
Subscription
HubSpot provides the facility to generate a blog subscription form for each blog automatically. This feature helps you add the option of blog notification frequency: Daily, Instant, Monthly, or weekly to customize the form.
For each subscription, you can publish and maintain blog notification emails without facing any specific problem. Learn how to set up blog subscription options.

Dashboard
With the help of your blog dashboard, you can view your blog posts and monitor the analytics result of your blog, like settings, author, tags, etc.
HubSpot blog dashboard is divided into sections: Manage and Analyze.
The manage section will offer you to access your blog posts and create new posts by clicking on the create blog post button at the top right corner of the dashboard.
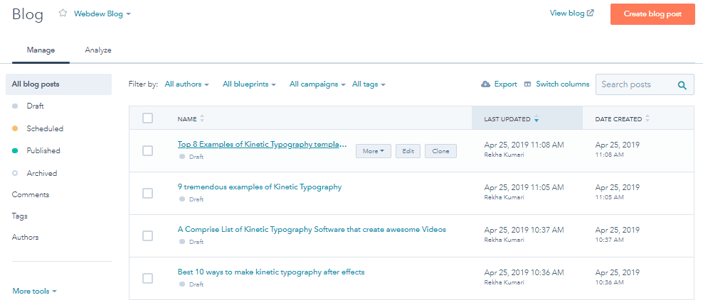
Using it, you can view comments, Authors, Tags, which will further help you optimize your HubSpot templates quickly.

By clicking on the analyze tab, you can see your blog performance and view your blog subscribers by evaluating the information and stats.

Comments
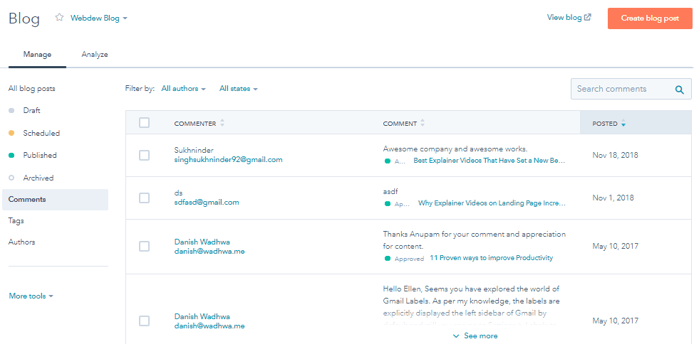
If you only want to view the comments on your respective blog, then the comments feature of HubSpot Blog will assist you. By managing your comment settings, you can choose whether you want to show the comments on your blog or not. As per your settings, comments will be updated for each blog.
Listing Page
Do you wish to sort your blogs according to the author, tag, or date? Are you facing a problem in categorizing your posts? Relax!
HubSpot provides a listing page feature that will help you to view your live listing pages. You have to click on the View blog button at the top of the blog dashboard and dynamically render your blog listing pages.
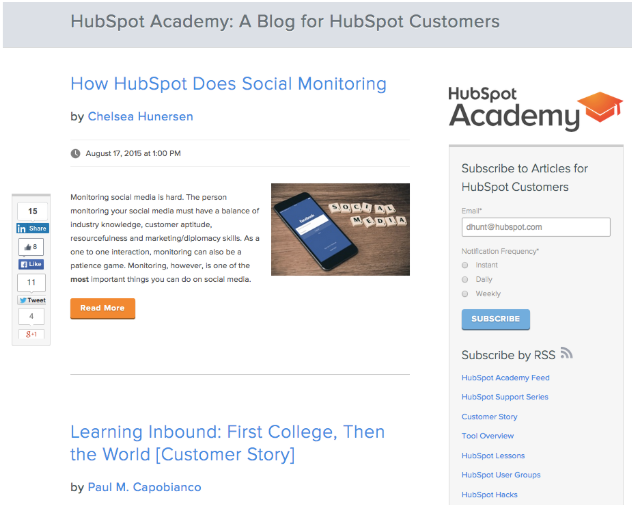
All the features listed above will aid you to successfully publish the blogs and make the changes easily if needed. You might be planning to enhance your blog performance by using HubSpot Tool.
Are you worried about how to use it?
Scroll down and read the next chapter to take a deep understanding of the HubSpot Blog tool.
A quick Tour to HubSpot Blog Tool
Now, you have landed at the station, where you will get a step-by-step guide to use the HubSpot Blog tool, how to create blog post in HubSpot, how to edit blog post in HubSpot, and how to add new blog in HubSpot. Interested? Well, you should be.
Because here, you will get to know the footsteps about creating a new blog, editing, sharing, customizing, managing, and adding custom codes to HubSpot Blog post properly.
Let's first learn how to create or write a blog post in HubSpot.
Steps to create a Blog Post in HubSpot
Planning to set up or write a new blog in HubSpot? Complete the following steps to upload the content without facing any complexity.
- After login with HubSpot account, navigate to the menu bar. Click on Marketing Website Blog. You can also click on the setting icon by navigating to the left side of the desktop and click on Website Blog.
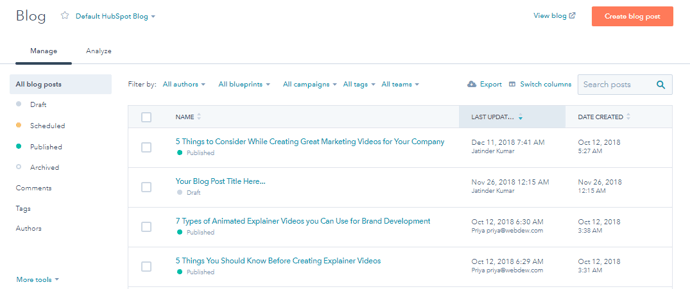
- To create a new blog, click on create blog post button which lies at the top right page of the desktop. After clicking, you will be directed to:
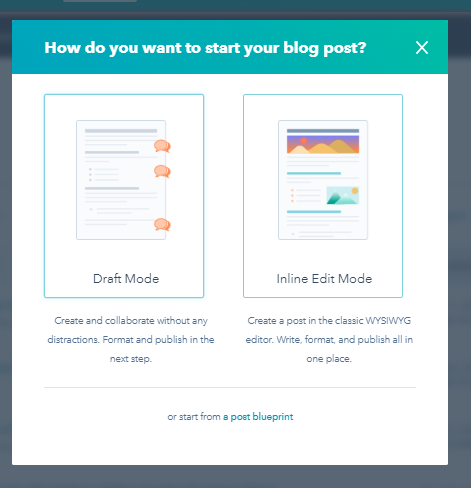
- Here, you will see two different sections. One is the Draft mode, and the other is Inline Edit Mode. Draft mode is selected if you want to focus on the collaborative setting into your bog. Here, you can format and publish the blog. Further, it will help you focus on your content before it's published and optimized.
- On the other hand, Go for Inline Edit Mode if you want to create a blog post quickly. Through this mode, you can write, format, and publish the blog all in one place. You can also edit your published blog at any stage.
So, let’s start with creating a form in Draft mode.
- After clicking on Draft mode, you will be redirected to:
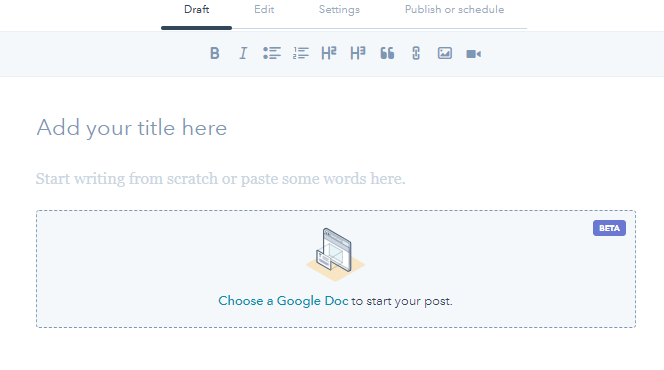
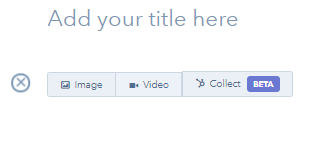
- Here you have to add your title and move your cursor to the text area. You will see the “ +” icon. Click on it and add images, videos and can also collect.
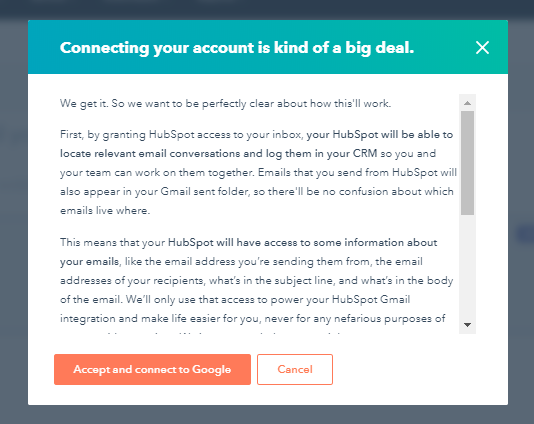
- If you want to publish a blog from Google post directly, Click on the “Choose a Google Doc” link. Then, click on continue, accept and connect to Google buttons.
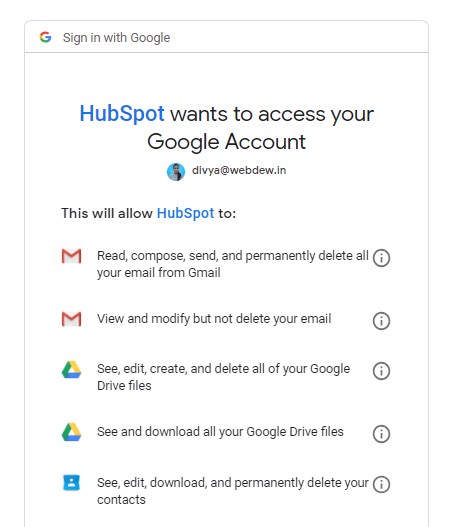
- After entering your email address, click on Allow Button.
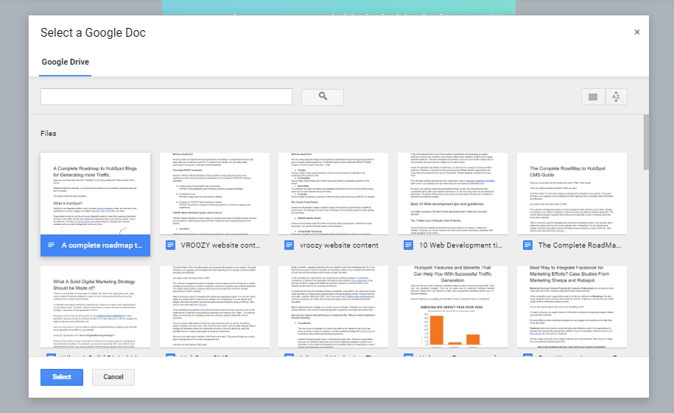
- Once the connection is made, you will see all the documents added in your google docs. Choose the file and click on the Select button.
- The selected document will be uploaded on the screen. Navigate to the right side of the page and click on Next Button.
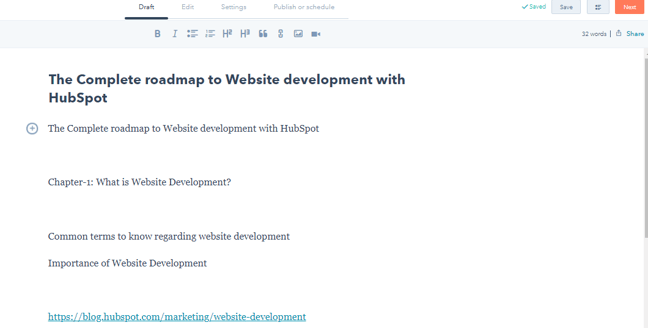
- Once you press the button, all your selected documents will get live.
Let’s know about how to create a blog in Inline edit mode.
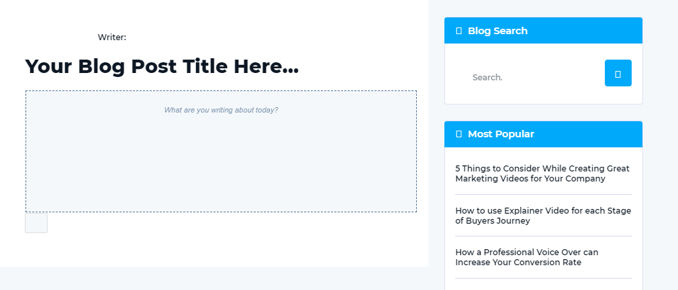
- After selecting Inline edit mode, you will be redirected to-
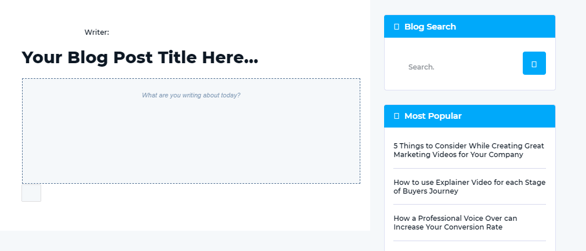
- Enter your Blog Title and text in your respective fields. Once all the information is added, Click on Save and publish button, which lies on the top right side of the dashboard.
By following all these steps, you can create a new blog and add it directly by using the HubSpot Blog Tool.
How to view, edit and share a Blog Post in HubSpot?
Have you published the blog successfully? No! Found some error in it? Now, want to update it correctly?
Don’t Worry! Getting through the below-added steps, you can easily make the changes and update the published blog as per your new requirements.
Steps to edit your Blog Post
- Go to Marketing Website Blog.
- Click on the drop-down list lies on the top left corner of the page.
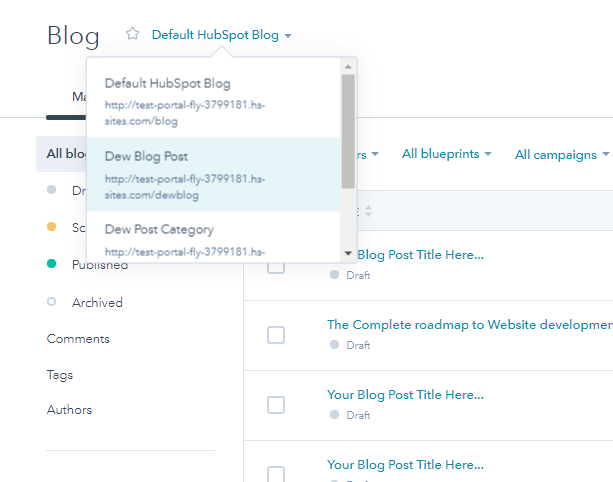
- Select your blog name. All the blogs that are published and want to be updated will be displayed on the dashboard. After clicking on one of the blogs, you will visit:
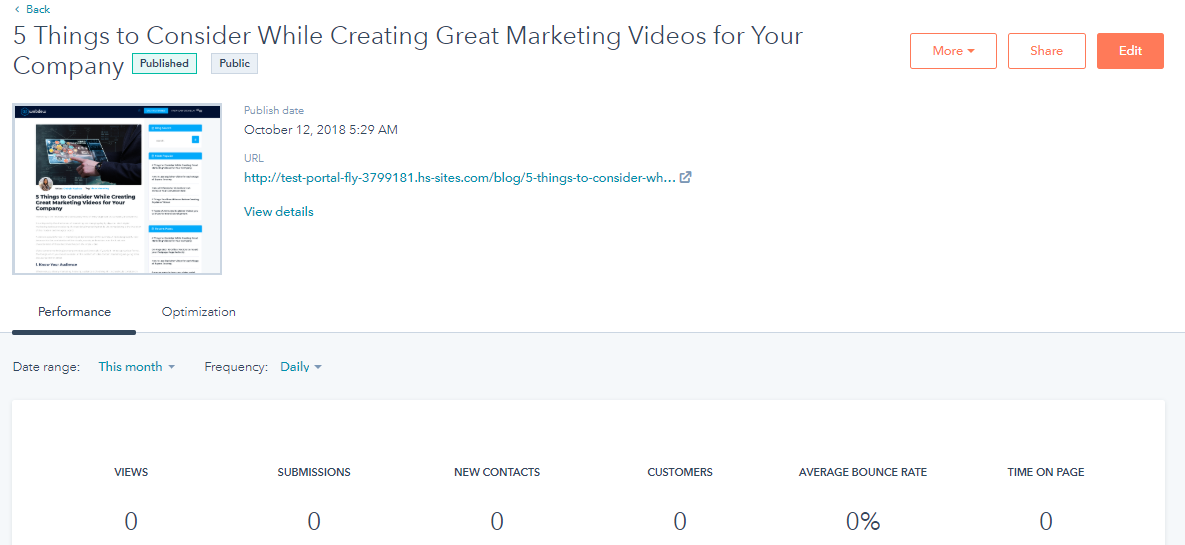
- Navigate to the right side of the page and click on the Edit button.
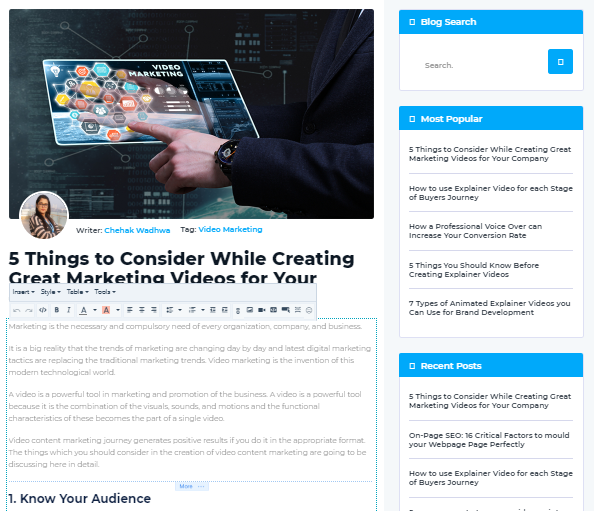
- Make all the changes you want to make in the respective text area. You are done with all the updates!
- As all the changes will be saved automatically, you just have to press the updated button from the top right corner of the page.
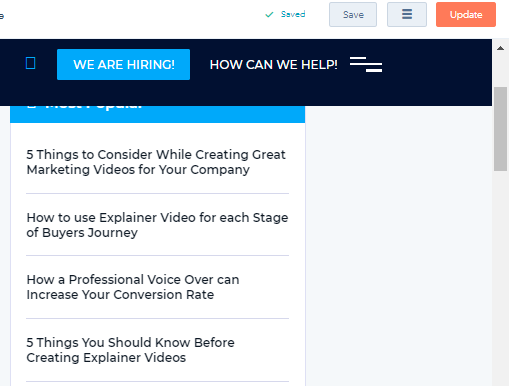
- After clicking the Update button, your uploaded blog post will be updated.
Steps to share your Blog
- To share your selected blog, you just have to click on the share button that lies on the top right side of the desktop.
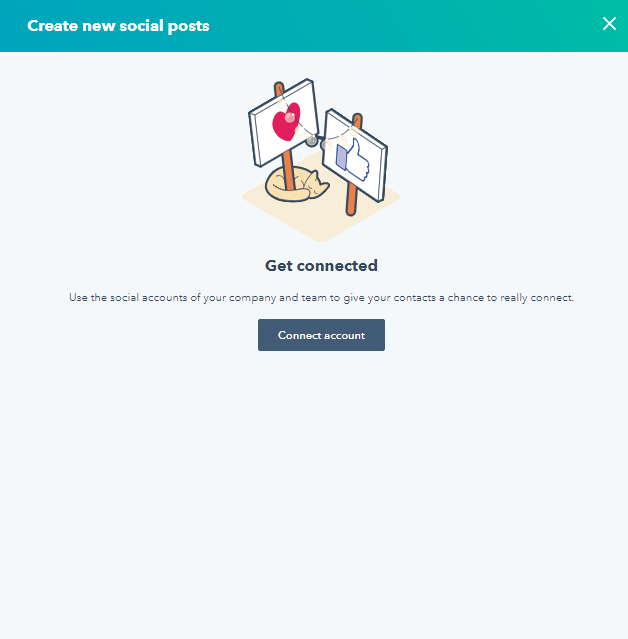
- Click on the Connect Account button. You will be redirected to:
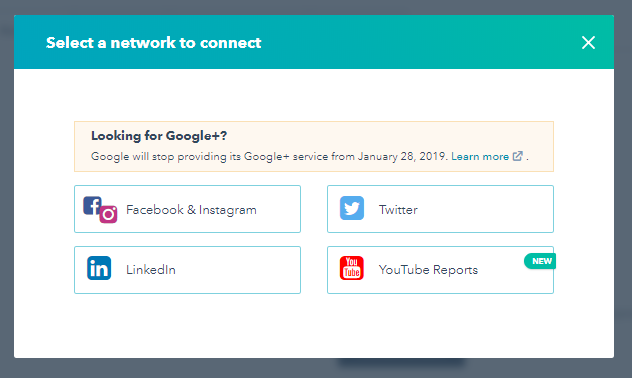
Here, you have to select the platform where you want to share your blog post chosen. Let’s suppose Facebook Instagram link is selected.
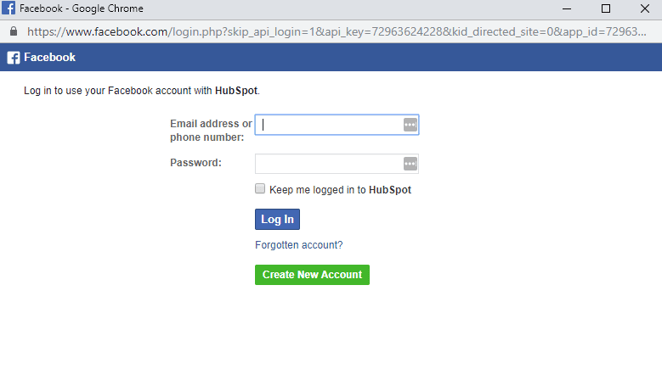
- Make a connection by entering your email address and password to share the blog. You will be directed to the home page of Facebook. Thus, your selected post will be shared on the chosen platform directly.
Steps to view your Blog Post
Do you want to view all your published blogs?
- Navigate to the blog page and click on view blog link which lies in the top right corner of the dashboard.
- After clicking the link, you will see all the blogs which are already published on your website.

Footstep to manage, and customize HubSpot Blog Post Settings
Managing your HubSpot blog settings is essential because it will be difficult to share and create new content on your blog. To achieve such goals, you should customize your settings, root URL, format, etc. accurately.
Let’s get to the footsteps for managing your blog setting.
- Once, you log in with the HubSpot account, Click on setting icon in the navigation bar.
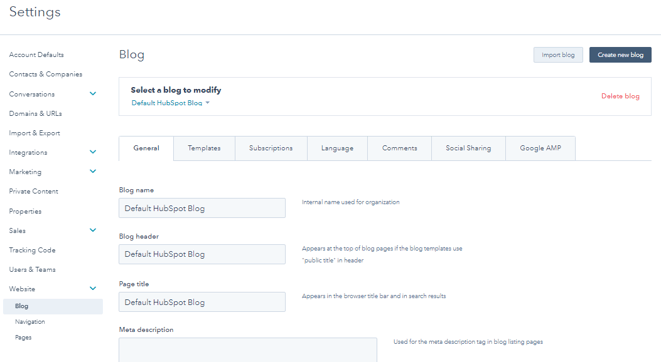
In the dashboard, you will see the following tabs:
- General
- Templates
- Subscription
- Language
- Comments
- Social Sharing
- Google AMP
GENERAL
- Before starting your content, you can update your settings in the respective fields such as blog name, blog header, Page title, Meta description, and Blog root URL.

- By managing the basic setting, you can create a new blog without any trouble.
TEMPLATES
- Want to manage your blog post templates.? Navigate to Blog’s template settings. Here you have to select your blog template. Template settings will help you to customize your blog posts on listing page efficiently.
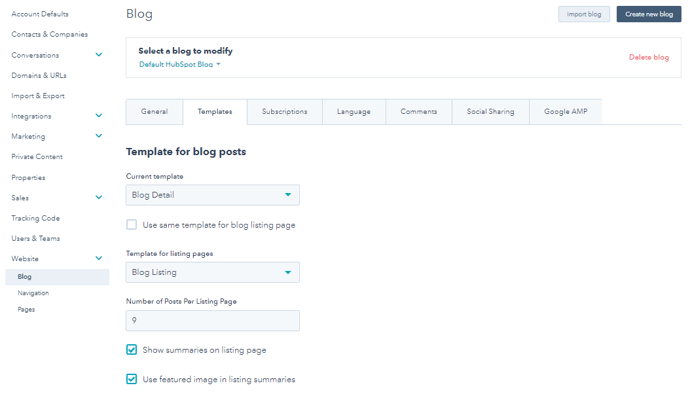
- To select the applied templates and blog listing page, Use Current template option.
- By clicking on the checkbox, you can choose the same templates for the blog listing page. You can also decide whether you want to show summaries on listing page and use featured image in listing summaries.
- Through the setting, you can also customize header HTML for Blog Listing pages. Click here, to learn more about how to customize your blog template options.
SUBSCRIPTION
- By maintaining your subscription setting, you can edit and enable your blog email notification.
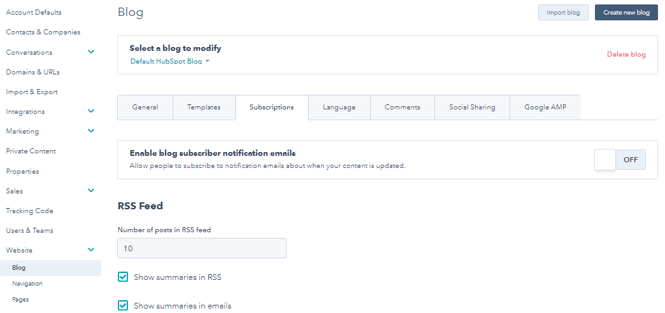
- You can enable blog subscriber notification emails, just by switching on the button. You can easily enable or disable each email type to reflect accurate frequency options.

- In the RSS feed setting, you can maintain and customize how the blog appears.
- Here, you can add the number of posts in RSS feed. You can use the checkboxes to feature your blog post summaries in emails.
LANGUAGE
- The language setting will help you to customize the blog post date, month and language.
- By clicking on language for dates drop-down list, you can choose any language in which you want to post your blog.

- By clicking on publish date format menu, you can customize your blog post publishing dates. You can also customize your blog posts by clicking on the drop-down list of month format.

COMMENTS
- Click on Comments tab to manage your comments settings such as blog comment notification, moderator setting, etc.

- If you want all the visitors to leave a comment on your blog, then switch on enable commenting button.
- If you want to add new visitors who leave a comment to your database, select the allow comments to create contacts.
- If you want your team to approve the content before publishing, then click on Moderate content checkbox.
- You can also set who will receive the email notification of new comments added in the blog. For such settings, click on the drop-down list and update the configuration.
- You can also customize the level of comments which can be threaded with the help of threaded comments drop down menu. More are the levels; more visitors can leave their comments on your blog.
SOCIAL SHARING
- Do you want to share your blog post over social sites without any issue? If yes, then start customizing your social sharing setting by clicking on social sharing tab.

- To choose a social sharing account, click on the default Twitter account drop-down menu.
- To include social sharing icons in your blog, choose the respective Social media channel checkbox and start sharing your blog posts within the selected network in a single click.
GOOGLE AMP (Accelerated Mobile Pages)
- By Customizing Google AMP settings, you can load your blog content quickly. It will help your visitors to read the content easily.

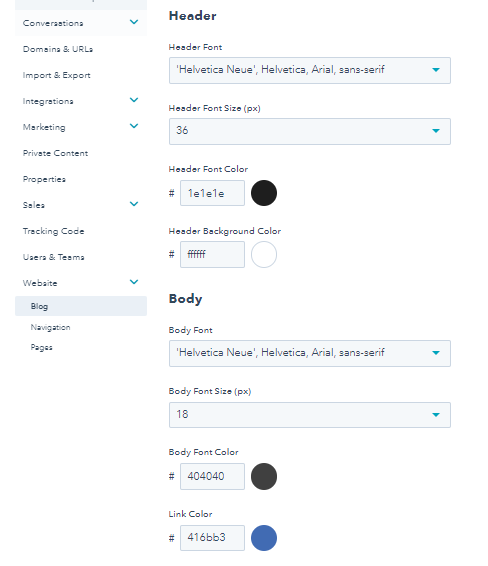
- To enable such goals, click on the Google AMP tab and update the page easily such as Logo images, text, header format, and body format. These settings will aid you to standardize the colors, font, etc.
Are you aware that by adding custom code to HubSpot blog post, you can develop the modules to add advanced features to your blog?
Isn’t it interesting? Without changing any code, you can change the module fields in the content editor and make your blog content attractive. Know more about how to build a custom coded template.
If you have any technical doubts, feel free to Contact Us and get our expert advice.
Last Words
Hope! All the steps mentioned on how to write a blog post in HubSpot are clear. By following each step, you can customize and publish blog posts quickly and efficiently.
Now, you might be waiting for your next blog post to go live. Are you?
Start implementing by evaluating the HubSpot blog post checklist; you will see a considerable change in your HubSpot blog performance! You will be able to publish good quality content, which will further help you grab visitors' attention and generate more traffic to your website.
Need any help setting up your HubSpot CRM? Well, get in touch with us and our HubSpot experts will take care of the rest.
Frequently Asked Questions
Can you use HubSpot for blogging?
HubSpot offers a blogging platform for your content marketing needs. It enables you to create, edit, preview, and schedule your blog posts with ease. With HubSpot, you can craft engaging blog content that not only draws in visitors but also transforms them into valuable customers. It's a user-friendly tool to boost your blogging efforts and enhance your content marketing strategy, helping you reach a wider online audience and achieve your business goals.
What are the benefits of blogging HubSpot?
Blogging on HubSpot offers several advantages. Firstly, it simplifies the management of inbound campaigns, making it easy to organize and control your marketing efforts. Secondly, it's SEO-friendly, improving your blog's visibility in search results. Thirdly, HubSpot provides fast loading times for a better user experience. It's also optimized for personalized lead generation, aiding in lead capture and conversion. Lastly, having both Customer Relationship Management (CRM) and Content Management System (CMS) in one place streamlines your operations, allowing for seamless integration and efficiency in managing your online presence and customer interactions.
How do I start a successful blog on HubSpot?
To create a thriving blog on HubSpot, think about its connection to your business. You have two options: run it as an independent entity or integrate it with your website and brand. At HubSpot, our blogs are an integral part of our core brand, residing on the subdomain blog.hubspot.com. You can easily find them in the main navigation under "Resources." This approach maintains consistency and accessibility for our audience, ensuring a successful blog that aligns with our brand's goals and values.
Why HubSpot is better than WordPress?
HubSpot is simpler than WordPress because it lets you easily arrange things on your website with a drag-and-drop tool. It also helps with getting your site noticed on search engines and has a built-in system for managing customer relationships. However, it's not as flexible for making custom changes. On the other hand, WordPress is a bit trickier to learn, but it gives you more control over where your website is hosted and how it looks. So, if you want something straightforward, HubSpot might be your choice. But if you're tech-savvy and want lots of options, WordPress could be better for you.
