If you are a regular reader of my blogs, you might be familiar with HubSpot forms.
Indeed, lead generation is one of the most challenging tasks that organizations face while achieving business goals and revenue. But if you leverage the power of HubSpot Pop-Up forms, HubSpot survey forms, etc., in the right way, you can easily hit your targets.
If you think that pop-up forms create annoyance and distract customer experiences, this article is for you.
But before we discuss the creation and usage of HubSpot Pop-Up Forms, let's throw some light on HubSpot pop-up forms in detail.
What is HubSpot Pop-up Form?
Nowadays, pop-ups are everywhere. Over the course of time, pop-up forms have re-emerged as a well-known marketing tactic for promoting content, driving blog subscriptions, growing email lists, and giving a boost to lead generation.
Pop-up forms are also known as lead flows. Basically, these are small forms embedded into web pages to provide an opportunity for all those who visit your website.
In layman's terms, Pop-Up forms are one of the easiest ways to collect customer information that is interesting to avail your services and appears on any page of your website.
When the HubSpot pop-up form appears on your website, it increases the chances of converting more visitors into leads. As per the statistics, the average conversion rate of pop-up forms is around 9.28% which I believe is a pretty good number.
Once pop-up forms start working, you will be able to reach a large audience at the right time effortlessly.
I can assure you that you might be getting excited to create one for your website and bring in more leads that you might not have imagined to date.
No worries! The next section of this guide will familiarize you with the steps you should follow while creating a website.
Steps to create accurate and efficient Pop-up Forms
Pop-Up forms make the engagement process of lead capturing easy. Whether you want to create the lead capture form for landing pages, blog posts, or website pages, you have to follow the same steps.
A Hot Tip- To add forms to an external page, installing the HubSpot tracking code on your external website is necessary. Say, if your website is built on WordPress, then you have to install the HubSpot WordPress plugin on your WordPress website.
Now, let's discuss the steps by following which you can create Pop-up forms in HubSpot accurately.
- HubSpot account, navigate to the menu bar.
- Click on Marketing > Lead capture > Forms.

Navigate to the top right corner of the form page and click on Create form. You will be redirected to the page added below:

Click on the Pop-Up forms from the left sidebar and click on the next button added on the top right corner of the page. You will redirect to the page added below:
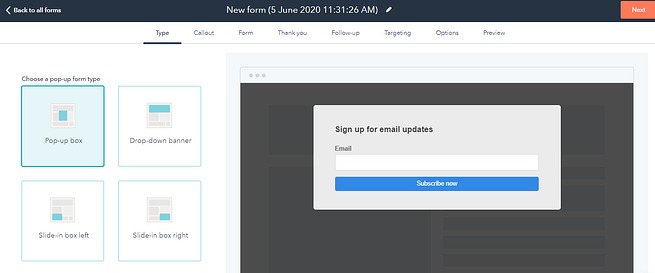
Now, you have to customize the name of your pop-up form. For this, click on the pencil icon added at the top and re-enter the name you want to give to your form.

Once the name of your firm is added, make sure you follow the below-mentioned point properly.
1- Type
Firstly, you have to select the type of pop-up form you want to create. There are basically three types of pop-up forms, which you can select by clicking on the Type tab. It includes,
- Pop-up box- By choosing this type, you will create a pop-up box that will appear on your page.
- Drop-down banner- This type of form will appear in the form of a drop-down banner from the top of the page.
- Slide-in box right/left- This form will appear from the right or left side of the page.

Once you select the type, don't forget to click on the Next button added at the top right corner of the page.
2- Callout
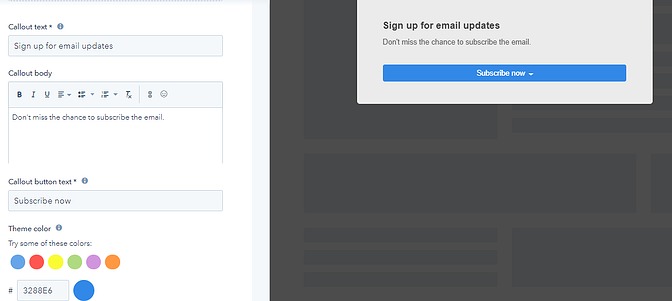
By clicking on the callout tab, you will customize the content, which will help you grab the visitor's attention. Here you get an option to add:
Featured image- Whichever image you choose for the pop-Up box, make sure it will be displayed on both form and callout. So, make sure you choose an accurate image as it helps you catch the eyes of visitors.
Callout Text- It is basically the main text on the callout through which people will get attracted.

Callout body- Here, you have to add some additional information on the callout to provide deeper insight about the same. It's totally your wish, whether you want to add text in the callout body or not.
Callout button text- As the name suggests, you have to enter the name you want for your callout button. Such as click here, Subscribe now, etc.
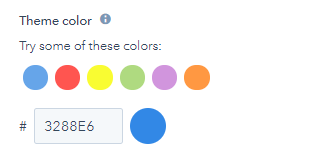
Theme color- Here, you can select the theme color according to choice. You can directly select the color by clicking on the respective color bubble or entering a Hexa value in the provided text field.
Button link- Choose the option with which you want to link your callout button. You have to select from:

- Form step- Select this option when you want to direct your users to a form. If you choose this option, then click on the form tab to customize your form.
- Non-HubSpot URL- Choose this option if you want to link the button to an external page.
- HubSpot page or blog post- By choosing this option, you have to select a HubSpot page or blog post from the drop-down list.
- File download: If you want to link a button with a specific file, then choose this option and browse the file you want to attach.
- Meeting link- Choose the meeting link from the drop-down menu with which you want to link your button.
- Calendar event- Select this option to create and link the button with a specific calendar event. By entering the event name, start date, end date, time zone, location, and details, you can set up the event easily.
All the changes will appear on the right side of the page, giving you a clear idea of how your pop-up form will look like when it goes live on your page.
3- Form
For customizing the Pop-Up form, click on the form tab and follow the points mentioned below.
Form body- If you want to make people know what you are offering to them with your pop-up form, add detailed information in this field. 
Added fields- While adding fields, you can automatically add default email if you click on "+Add another form field" button to add additional fields. Now, you have to select the field type from the drop-down list.
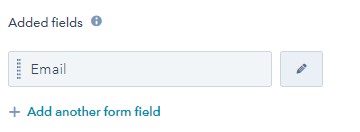
If you want to customize the form field, click on the pencil icon added at the right side of the respective field. There you can change the field label, placeholder, and email domain to block.

Form button text- Update the name you want to give to your form in the added field.
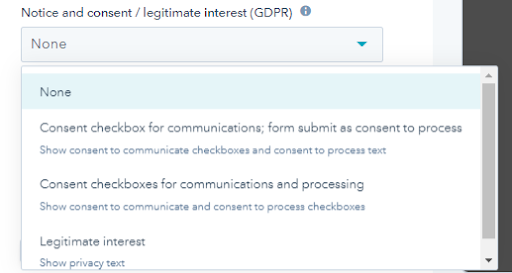
Notice and consent/legitimate interest(GDPR)- If you want to change the notice and consent of the form, then select the option for the drop-down list. Don’t forget to enable GDPR in your HubSpot account.
Language- Select the language you want to choose from the drop-down list.
Set Lifecycle stage- Here, you will select the lifecycle stage of your contacts from the drop-down list who submit the Pop-Up form.
CAPTCHA- If you want to provide protection against spam submissions, then don't forget to enable the CAPTCHA.

After customizing all the fields, don't forget to click on the Next button added in the upper right corner of the page.
4- Thankyou
For creating a thank you message, click on the "Thank You" tab. You can change the message in this respect.
Furthermore, if you want to add a button next to the thank you message, click on "Add a button".
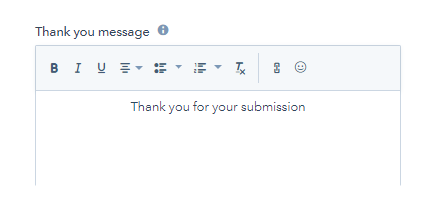
In the provided area, name the button and select the link with which you want to redirect. You will see various options, like- 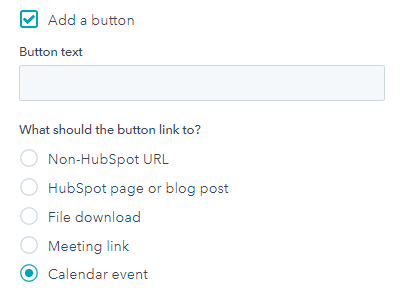
Non-HubSpot URL- Choose this option if you want to redirect the visitors to an external source.
HubSpot page or blog post- If you want to redirect the visitors to the HubSpot page or blog post, choose the post from the drop-down list.
File download- If you want to redirect the visitors towards the downloaded file, then choose the file download option and browse the file you want to choose.
Meeting Link- If you want the visitor to schedule a meeting after clicking on the button, then the option is for you. For that, you have to select the meeting link from the drop-down menu according to your requirement.
Calendar event- To add a new calendar event and redirect the visitor towards it, select the calendar event option. Add the event name, start date, end date, time zone, location, and details accordingly.
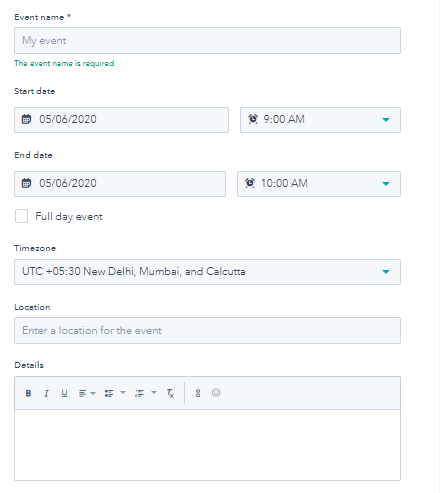
5- Follow-up
To create a follow-up email, choose the follow-up tab. The email you create will be received by the individuals who will submit the form by clicking on “create a follow-up email.”
When you click on create a follow-up email, update the fields added in the right panel. The details you want to customize includes:
Subscription type- To edit the email subscription, select the subscription type from the drop-down menu.
From User- In this field type, you have to select the sender name to whom you want to send a follow-up email.
Subject line- Here, you have to add a subject line for the follow-up email to describe the information better.
Body- To engage the contact, enter the email body text for better engagement.
Edit email footer- If you want to customize the company name and address, then u can use this option.

Once all the information is updated, click on save and view the preview email.
6- Targeting
If you want to customize the pop-up form displays, then click on the targeting tab and update the field areas accordingly. Here you can add the filters on the visitors to whom you want to see your pop-up forms.
After clicking on the targeting tab, you have to add content in the below-mentioned fields:
Website URL- Here, you have to choose the web pages on which you want to add your pop-up form for targeting your visitors. Click on the first drop-down button and select the website URL.
Now, click on the second drop-down button to select the criteria you want to choose from is all pages, is, contains, begins with, and matches wildcard.
Furthermore, you can also add targeting rules by clicking on the "add rule" button. It will allow you to set the criteria based on query parameters. You can add as many numbers of rules according to your requirements.
Also, click on "Add excursion rule" button to exclude the pop-up form on specific pages.

Visitor information and behavior (optional)- Adding the optional filters, you can get more control on which visitor will receive the pop-up form.
You just need to select the filter according to your needs from the below-mentioned list; segmented list, visitor, device type, browser language, country, CTA clicked is, Days since last visit, Form viewed is, session count, page/s visited, referral URL, SEO topic, and SEO topic history.
Also, you can add a pop-up form and select the filtering rules by clicking on the "Add filter button".
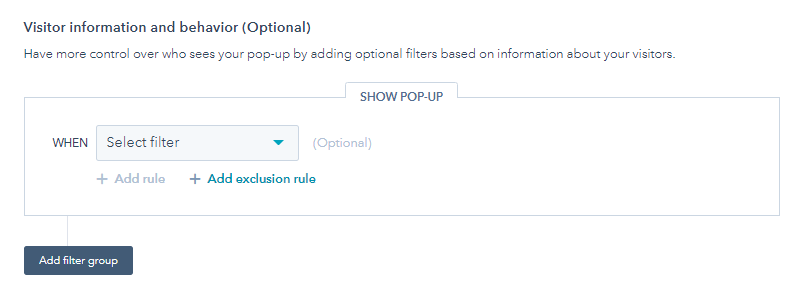
Here, you can also add triggers just by choosing the option provided below;

Once all the information is added, click on the Next button added in the upper right corner of the page.
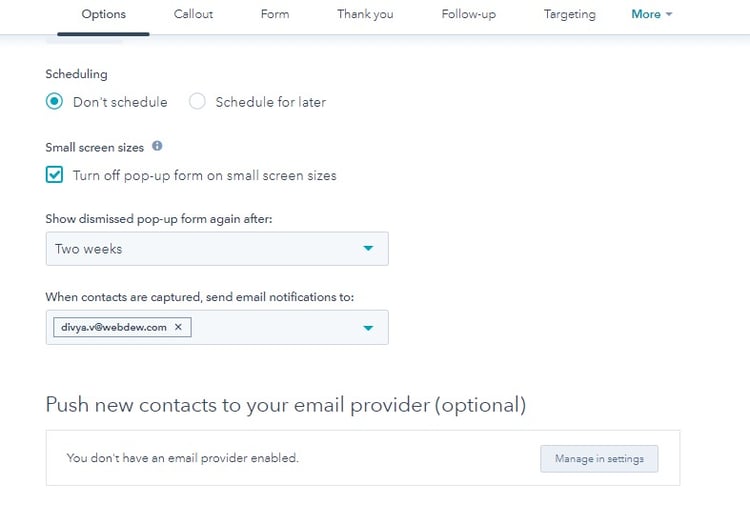
7- Options
By clicking on the options tab, you will get an opportunity to customize the below-mentioned points:
Scheduling- Here, you can choose the publish date and time for the drop-down menu on which you want to schedule your pop-up form for later.
Small screen sizes- Choose this option if you don't want to choose a pop-up form on the small screen sizes. I would suggest you disable this option, especially if your pop-up forms are mobile optimized.
Show dismissed pop-up form again after- Here, you can choose when you want to show the pop-up form again to the visitor who was dismissed once.
When contacts are captured, send an email notification to- Choose the contacts to whom you want to send an email notification when captured.
Push new contacts to your email provider(optional)- Click on "Manage in setting" button to enable the email provider to push contacts to.
After updating all the fields, don't forget to click on the Next button added at the top right corner of the page.
8- Preview
The last but not least step in creating a pop-up form is previewing the entire page before taking it live. Here you will get an idea about how your page looks.
Click on the Mobile, Tablet, or desktop button to see how the pop-up form will appear on the respective screen. Now, click on arrow keys added at the upper right corner of the page to view each step of the pop-up form.

9- Publish
Once you are satisfied with your created pop-up form, click on the Publish button and take your pup-up form live.
Do Pop-up Forms really Work?
Yes! The pop-up form helps in converting more leads and generate more sales; marketers prefer using pop-up forms.
Pop-up forms may be considered an annoyance or interruption to user experience by some. However, research has shown that they can be an effective way to engage with potential clients.
If you want to drive blog subscriptions, then you should definitely include pop-up forms. According to the AWeber analysis, pop-up forms in blog subscriptions convert 1375% more than traditional forms.
Moreover, as per the statistics, the average conversion rate for creating the best pop-up is 9.28%. This shows that if your pop-up form is the highest performing, then there are chances that the viewer will take action right away.
An additional 9.3% conversion to the website is not bad. It will help you generate more sales and hit the business goals.
So, if you also want to improve the performance of your website and better the user experience, then start creating user-friendly pop-up forms that stick to the viewer's mind.
Most people think that pop-up forms are annoying, but if used properly, they can be a part of inbound marketing that adds value to people's lives and boosts your conversion rate.
Tips to create Pop-ups that highly Convert
Now that you are excited to create pop-forms, but make sure you keep the below-mentioned points in mind. Keeping these things in mind will allow you to create high-converting pop-up forms without any hassle.
Understand how People will engage with your Pages
One of the common mistakes that marketers perform while creating pop-up forms is adding pop-up forms at the wrong time that annoys the views and complex them to redirect to another page, which further increases the bounce rate.
So, if you want to engage the people at the right time, make sure you add the pop-up forms and triggers at the right time.
To achieve this goal, you have to think from the perspective of viewers. Let's take an example of the blog readers. If the reader feels interfered and wants to read the blog, then they will probably scroll down. In such cases, adding a pop-up form in the middle of the blogs is the right approach to engage the viewers.
On average, if the viewers stay on your product for more than 30 seconds, then it's the right time to add a pop-up form. To know the people better, you can evaluate the average time period, bounce rate, etc. The entire data will give you a better idea of the right time to engage the viewers.
Create Pages that are informative and Relevant
Another thing that you should consider while creating a pop-up form is the visitor's experience on the website. One of the best ways to better the customer experience is by offering relevant and valuable data through the page they are currently on. This tactic will help you grab the attention of the right visitor's at the right time.
Improve the Mobile User Experience
Around 80% of users use mobile devices to browse the content. There are no two opinions that pop-up sometimes messes the user experience that may reduce the google rankings, so it is really crucial to work on the mobile experience.
Always try not to add a pop-up form on the entire screen as it may ruin the customer experience and might create difficulty for you to find a new solution without any problem.
Add User-friendly and actionable Language
Creating a pop-up form that is actionable, specific, and human will help you attract the viewers and compel them to take the desired action. If the visitor gets an idea of what they will get, then there are more chances to get inspired to take action. So, always notify the viewers while creating pop-up forms.
In a Nutshell
Now that you have a clear understanding of HubSpot pop-up forms, you can easily create appealing and customized pop-up forms that help you keep your business at the top.
Well! Creating an appealing and accurate pop-up form will generate more leads and allow you to build strong customer relations with the customers.
But, still, if you have any second thoughts while creating a pop-up form in HubSpot, feel free to contact us.
Our HubSpot experts are available 24*7 to help you resolve all your queries regarding HubSpot right away.
Frequently Asked Questions
How do I use a pop-up form in HubSpot?
To use a pop-up form in HubSpot, start by logging into your account. Then, go to Marketing and click on Lead Capture, then Forms. Choose the form you want to use, and click on the Embed button in the top-right corner. From there, pick Popup Form from the options provided. This will set up a pop-up form on your website, which can be a helpful tool for capturing leads and engaging with your audience.
How do you use pop-ups effectively?
Using pop-ups effectively involves striking a balance between catching users' attention and not overwhelming them. Prioritize user experience by limiting the number of pop-ups to prevent annoyance. Too many pop-ups can lead users to ignore even essential notifications, as they become disruptive and distracting. Ensure that pop-ups are relevant, timely, and provide value to your visitors. Additionally, employ exit-intent pop-ups, which appear when a user is about to leave the site, offering a last chance for engagement. Make sure the design is unobtrusive, easy to close, and mobile-friendly, enhancing the overall user experience while achieving your marketing goals.
Are pop-up forms effective?
Pop-up forms are like friendly invitations on a website. They ask visitors to do something, like sign up or share their email. These forms are powerful tools for businesses. They help gather important information about the people who visit the site. This data is like a treasure map for marketers. It shows them who their audience is and what they're interested in. With this knowledge, they can make special offers and messages that really speak to their visitors. This leads to more sales and happy customers. So, yes, pop-up forms can be really effective!
How do you increase form conversion rate?
To boost your form conversion rate, make the 'Submit' button stand out and encourage action. Employ inline validation to give real-time feedback, eliminating user frustration. Minimize distractions and offer clear directions. Craft error messages that guide users, not just warn them. Simplify password requirements. Avoid lengthy drop-down lists. Employ microcopy to gently guide users through the form, explaining what's needed. Be flexible in accepting various user inputs, ensuring a smoother and more inclusive experience.
